{Let's Learn Photoshop Together}
It's been quite a while since I have touched base on photoshop.
What I want to share today is a tool I frequently find myself using.
The Curves tool is an extremely useful element that can be highly underutilized.
Maybe you've opened it before and played around only to quickly x-out.......
It's a lot easier to control once you understand the basics of how it works.
Whether you like to make drastic changes or minor adjustments, curves is a great starting point.
This video below is a basic guide for the beginning Curves user.
Quick Start Tutorial
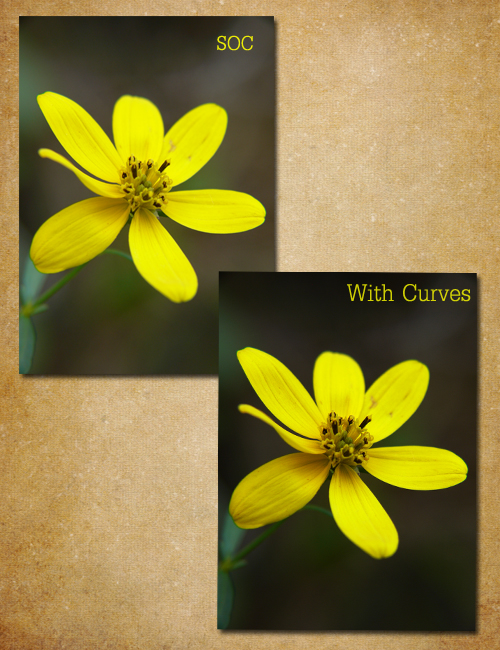
Below is a very subtle but effective example of how using Curves can enhance your photos.
Adding contrast can emphasize texture or intensify
subject-background separation, like in the 'with curves' photo below.
Darkening the shadowy background even further makes the yellow flower pop.
It's not a huge change, but I think it makes a difference.

The key concept with curves is that you can never add contrast in one
tonal region without also decreasing it in another.
In other words, the curves tool only redistributes contrast.
If you had some trouble following in the first video,
here is another one that may help clarify.
Curves : Basics
{Let's Learn Photoshop Together}
If you have any questions, please don't hesitate to ask!

my favorite use of curves so far is for playing with photos - applying the film grain filter to give it a different effect and then using curves to only show part a specific part of the photo - like this:
ReplyDeletehttp://retinalperspectives.wordpress.com/2008/05/02/have-i-mentioned-how-much-fun-it-is/
Oh my goodness! I am pretty good at curves, but I have to thank you for the link to this wonderful website (west coast imaging) They have answered so many of the questions I don't know where to find, and they are all in one spot.
ReplyDeleteyou ROCK! thanks for always putting super helpful things on your blog.
I was only wonder the other day when you were going to do anther one of these as I had to refer back to one of your old lets learn photoshop posts the other day. I will defiantly try this I have a big weekend in font of me so next week, when processing shot I will give it a go.
ReplyDeleteI wish I were creative enough to have pictures to emphasise in the first place!
ReplyDeleteexcellent post. that's a great video, makes things very clear.
ReplyDeleteThanks for the lesson. I see how you used it and like what I see. I need to do more with it though.
ReplyDeleteDefinitely something I need to get into... post-shopping my photos so they don't look so drab and crooked. Ah. If only I had some spare time, dangnabbit!
ReplyDeleteThanks for sharing this advice with us. I am still trying to pick up on Photoshop, so each and every piece of advice is truly appreciated. And I love your working example... it really helps :) I'm definitely going to have a practice with this technique.
ReplyDelete