Showing posts with label photoshop. Show all posts

Current Project: Newsletter for PACT


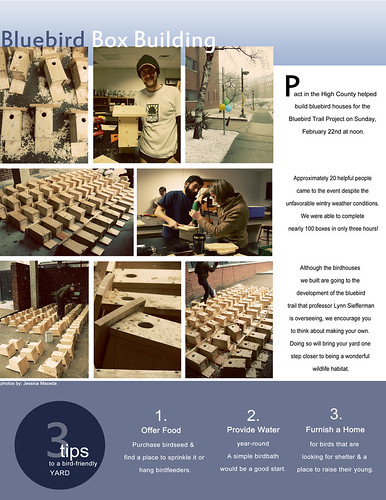
PACT Newsletter March (2nd page)
View Larger Version

Here is a sneak peak of the newsletter I am working on for PACT. I'm only sharing the second page since I am not completely done with it and because it's only fair that I distribute it to the group before showing everyone else. Recognize those photos? If not, maybe you missed the post I did on the bluebird box building event.

PACT is an organization here in the High Country that I have become involved with just recently.Upon joining, I had a desire to have an actual role within the group, so I signed up to be a board member as the communication & media chair. Although PACT is still in the growing stages and remains somewhat small, I think that once established, it will become so much more.

Our next project is to adopt and develop a wetland on the Greenway Trail which is right near our home. I am definitely looking forward to participating in that effort by taking photos AND getting my hands dirty!

The Alternative to Resolutions

Posted in Wordful Wednesday
Traditional methods of "getting things done" just haven't worked for me. Time and time again I will find that 'to-do' at the end of my list that will inevitably get transferred over to the next one I create. I have often wondered why I do that. Is it the task itself that seems daunting? Or is it just not that important? But, if it wasn't that important how did it end up on my list in the first place? Well, I let go of the why and instead concentrated on what I knew. I finally understood that my relationship with those to-do's needed to change, but how?

I decided to reformat my life.....
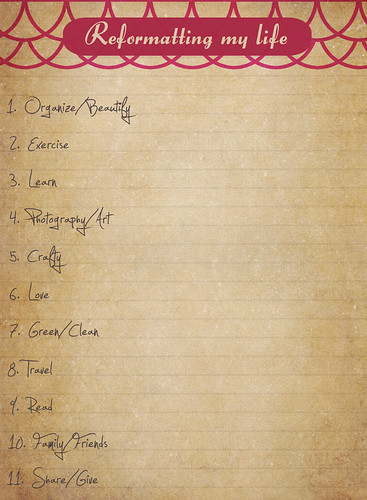
As I looked over the seemingly endless to-do list, I realized that all of my items could fit into a category. I began to formulate categories with a general idea in mind, areas in which I wanted to place more of my focus on but can't seem to find the time to do so. I hand selected the categories while keeping what I value and love about life in mind, as well as those hiding in between. I started with a pretty long list to say the least.

Breaking down the reformation......
Having a list of things I wanted to do within a week's time was far better than adhering to a list that didn't allow for deviations. It basically gives me a selection of to-do's that are parallel to my ever changing moods. I am still keeping a master list of items, but have included a weekly category sheet where I add accomplished tasks that get paired with the closest matching category. Since defining the categories is up to me, some things can go in to more than one. By mid-week, I surprised myself with how much I managed to get done.

How to go about reformatting your own life.....
The categories are made up of keywords, all of which I believe are important for me to achieve. I came up with mine based on the things I love/like to do and more importantly the things I wanted to focus on doing more. Having this list has forced me to find ways of incorporating those to-do's in a way that works best for me. As a result, I have crossed off a lot more items!

I know what you're thinking, "This is as clear as mud!" or "What are these so called categories?!" I've got something better than lengthy explanations about what I picked and why. How about a visual aid! You know I love those.

The Alternative to Resolutions

I'm sure you can see why my list contains certain items within, if you were to make a list, I bet you would come up with a few of the same selections. Of course this method won't work for everyone, but if you think it will work for you, it wouldn't hurt to give it a try. If anything, you may create some new habits that are actually good for you!

Who knows...maybe you'd be brave enough to share your categories or alternative methods of getting things done?! If that sounded like a double-dog-dare.....it was! :o)

Goes by too fast.......


Daydream


My weekend has consisted of a series of naps.
Today, we were finally roused to action and decided to go for a hike.
The weather was gorgeous, but it was chilly. I don't know if I'm ready for winter?!
Let's not think about that right now......

This week I plan to showcase a myriad of treks that I have yet to share.
I finally had a chance to go through some of those photos that have been piling up.
I hope everyone enjoyed their weekend.
Are you ready for Monday!?!?


Posted in Today's Flowers

No More Straight Lines!


{Let's Learn Photoshop Together}


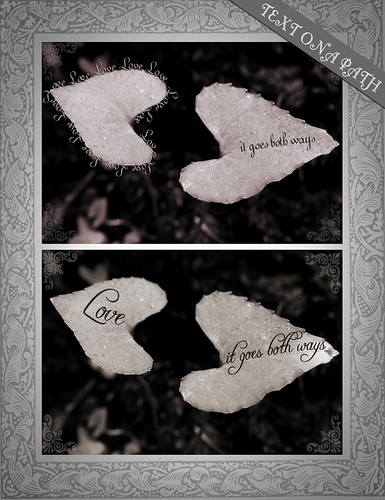
I was curious to find out how to get text to run along a designated path.
Thinking that, at some point, I would find it useful.
It was quite painless to learn, and at the same time got me interested in the pen tool.

Here are my first attempts at applying my handy new skill.
I wanted to demonstrate how it could be used,
and thought that variations would help.

Text on a Path


Here is a video on how to put text on a path.
(You may also learn a few other tips as well-I did.)


I liked the first video since it showed you how to create a path using the pen tool.
But just in case, here is another one to show you a different way of doing it.


I hope that you may find this helpful,
if so, please let me know so I continue to share more.

{Let's Learn Photoshop Together}

If you have any questions, please don't hesitate to ask!

Compare : Contrast


{Let's Learn Photoshop Together}

It's been quite a while since I have touched base on photoshop.
What I want to share today is a tool I frequently find myself using.
The Curves tool is an extremely useful element that can be highly underutilized.
Maybe you've opened it before and played around only to quickly x-out.......
It's a lot easier to control once you understand the basics of how it works.

Whether you like to make drastic changes or minor adjustments, curves is a great starting point.
This video below is a basic guide for the beginning Curves user.


Quick Start Tutorial


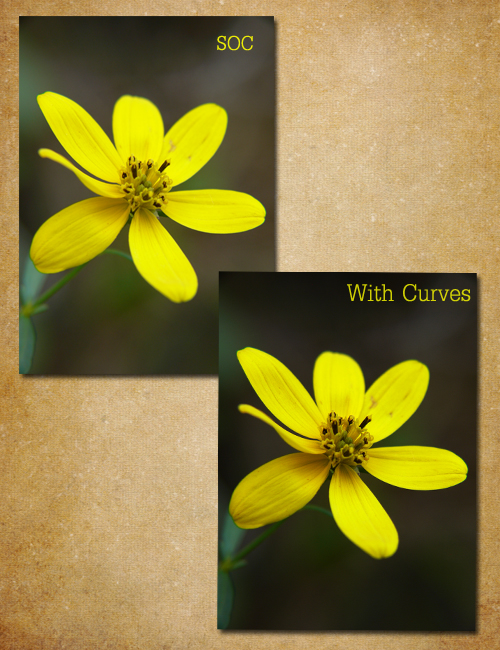
Below is a very subtle but effective example of how using Curves can enhance your photos.
Adding contrast can emphasize texture or intensify
subject-background separation, like in the 'with curves' photo below.
Darkening the shadowy background even further makes the yellow flower pop.
It's not a huge change, but I think it makes a difference.

Curves Adjustment Layer

The key concept with curves is that you can never add contrast in one
tonal region without also decreasing it in another.
In other words, the curves tool only redistributes contrast.

If you had some trouble following in the first video,
here is another one that may help clarify.
Curves : Basics


{Let's Learn Photoshop Together}

If you have any questions, please don't hesitate to ask!


White Reveals, Black Conceals

{Let's Learn Photoshop Together}

Pearly Whites with Texture


This is what I did with the concrete texture from last weeks exercise.
See what Liss & Elizabeth did with the concrete texture and layers.


Last week we touched base on the basics of how to use layers. A handful of you expressed interest in following along, although I only received 2 links to pictures where you used the texture. If you're not ready to share I understand, but I strongly encourage you to participate when you get a chance. If you did happen to post a photo, but forgot to send your link, you are more than welcome to include it in the comment section of this post.

It takes very little time to sit down and discover what will open many doors for you when processing a photo. I know it sounds cliché, but really, the possibilities will become endless! Once you begin to understand the basics of layers and how they interact with one another, finding different ways to manipulate them is where the real fun begins.

Dainty White

There are other useful tools to be aware of when using layers that weren't addressed in those last two tutorials - this is what we will go over today.
Layer masks are a handy way of applying a certain effect to a particular area of a photo.
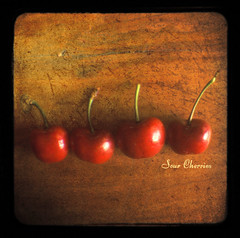
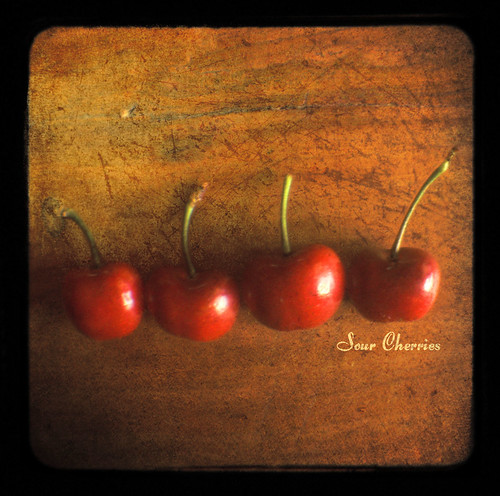
Sour Cherries (pictured below) was an instance where I used a layer mask.
I applied a texture to the photo, but I didn't want it to cover the cherries themselves, so I used a layer mask.

Sour Cherries

The video below is a pretty basic, but comprehensive tutorial on how to use layer masks.


This one is a useful tip on using quick masks, and is very short.


Below is a longer tutorial that will teach you various ways of using layer masks.
It may help to clear up a few things not discussed in the first video.
If you have more time, take a peek...


Don't forget, if you have any questions don't hesitate to ask. Also, if you have something that you would like to learn, but don't want to spend the time digging around, send me your suggestions.

A good tip to remember from this weeks Layer Mask exercise is "White Reveals, and Black Conceals".

If you missed last weeks "Let's Learn Photoshop Together" videos, click here.

Beyond The Basics

[Let's learn photoshop together]

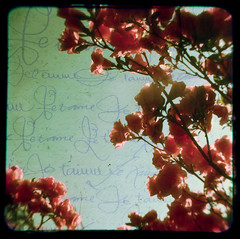
A month or so ago I started experimenting with photoshop beyond the normal, everyday adjustments I used the program for. It all started with my pursuit to merge a photo with a piece of scrapbook paper containing text.

Love Notes
This was my first experiment.

I quickly realized that layers are the most powerful tool that photoshop has to offer.
Once you harness the dynamics of layers, you will begin to understand all that is possible when you learn to use this function properly.

When I initially had the urge to learn how to use layers, all I really knew was that
I wanted to apply a texture to a photo. At the time, I didn't know what to look for when attempting to figure it out. After many searches, I finally discovered that I needed to learn how to use layers to assist me with what I had in mind. Finding resources on using layers is a lot easier than trying to find something that will teach you how to add texture. Essentially, it is the same thing.

Sweet Lullaby
This was my second experiment

When I first started I really only learned the bottom of the barrel basics. I was so eager to start that I didn't really take enough time to learn properly. A lot of what I accomplished was by trial and error. Video tutorials are what have helped me the most, as well as books that have accompanying photos. It's no surprise that I learn the most from visual media. You can explain something to me all day long but, until I see it, I probably don't fully understand! Cody knows this better than anybody :o)

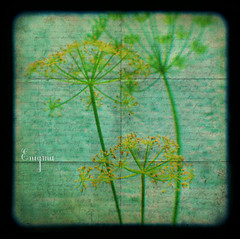
~ E N I G M A ~

Using layers is also good for those who aren't interested in adding texture, because it allows you to make non-destructive changes to your original photo. I have found this rather helpful video on using layers that I think will help anyone interested in learning more about photoshop. If you use Paint Shop Pro, the concept is the same but, the steps won't be exact. It is a somewhat long, but definitely worth what you will learn so take the time to view it. He's not as boring as some people who host videos, which makes it a bit easier to pay attention. His way of explaining layers by using a sandwich is very clever, and easy to understand.


The above video is a pretty basic assessment of how layers work together.

Below is another video I found to be equally interesting and informative, but a little more in depth. What I propose is that you watch the video in it's entirety.
Then actually go in and try out what you have learned with the video close by so that you can reference it.


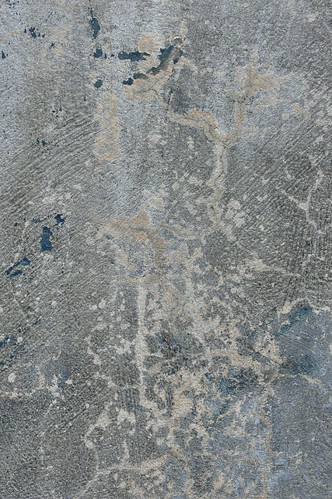
The photo below of the concrete texture is my gift to you.
Please use it to add texture to a photo you have, and share the results.
Pick a photo from your hard drive, save my concrete texture so that you can open it up in photoshop. Apply the texture using what you learned about layers, and manipulate it in whatever way fits with the photo. If you have any questions whatsoever, please post them here in the comment section and I will reply.


Concrete Texture
Larger Version

I know it would be better if I could do my own tutorials but doing so would take time away from my ability to produce what I envision. With that being said, I still want to help you in your pursuit to learn more about the seemingly scary world of photoshop. I have gotten many inquires about how I did something to a particular photo, which sparked my idea of us learning photoshop together. I am no where near being an expert, but I feel it's necessary to share what I have learned with you, so that in the process we can teach one another and offer support. I already have a few topics that I will cover, but I welcome any suggestions or interests you have as well.

With the next installment of "Let's learn photoshop together", I would love to include links to the photos in which you applied your newfound skill (so send them to me!). Especially if you used the concrete texture above. I myself have yet to use it with a photo, so I'll create one as well. This is not meant to be a challenge , and should only interest people who have photoshop (or an equivalent) and are looking to further their knowledge of the program. If you have any friends, bring them too!


Do you think something like this will be helpful to you? Are you interested in playing along?
Any and all comments are welcomed and appreciated.


P.S. The next one will not be nearly as long!!

*Orton Effect*


I remembered reading about a technique a few months ago that I was interested in trying out,
I added it to my bookmarks, which is sort of equivalent to the land of the lost.
I'm sure your bookmarks page is overflowing with miscellaneous sites or ideas found while surfing the world wide web.
Sometimes I get so deep into it that I can't even remember what got me started on a search in the first place!

Anyhow, since a lot of people have inquired about tutorials and techniques I have used (since I'm new to photoshop), I figured that I would beat you to the punch and share this effect.


*My favorite of the three*

The above shot was one I just tweaked using filters and your normal adjustments in photoshop.
I quite like the way it turned out.
The extra contrast gave it a dark purple color, which I think in turn added a little more depth to the flower.

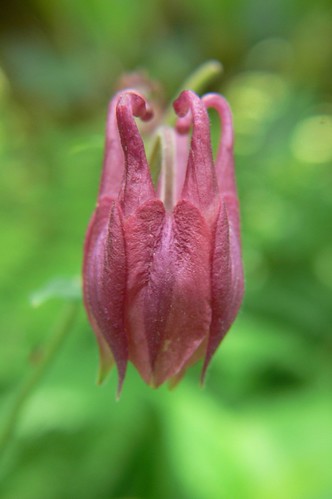
The shot below is SOC, straight-out-of-the-camera.

SOC Columbine Bud
*The SOC shot*

The SOC shot is not entirely dull,
but I felt like it was lacking something to give it a little more pizazz.
(yeah, I used the word pizazz!)


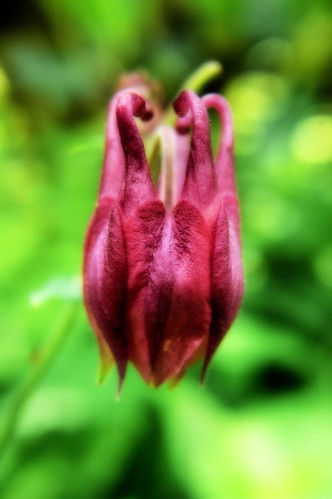
*With the Orton Effect*


The photo above is a result of the "Orton Effect", which is easy enough for anyone to do.
My monitor here at work is not portraying the photo as it did on my laptop,
the colors seem a bit off, and a little too bright (this monitor may need some calibrating).
But I liked the effect last night....

This sort of effect won't look good with all shots, but if you would like to give it a try
here is the link to the place where I found a quick photo tutorial.


Let me know what you think, if you use the effect and post a photo, I would love to see :o)


Sweet Treats


Sour Cherries


I bought cherries a week or so ago for the sole purpose of photographing them.
I have what you would call a 'thing' for cherries, particularly cherry related kitchen items.
For some time, I have said to myself that I needed to take some photos of the fruit to hang in my kitchen.
I finally did, and this one, in its TtV fashion happened to be my favorite.
Of course I put my newfound photoshop spin on it.

The name "Sour Cherries" comes from a song by one of my most favorite bands, The Kills.
How about I dedicate this photo to my most favorite girl, B. I can't wait for October!

Here is a very different cherry shot I posted over at the {366} blog.


Now, about the upcoming festivities......
I'm a little disappointed that I didn't get more of a fuss when mentioning a GIVE-A-WAY!
I mean, show a little excitement people?!?! haha
I suppose that I'm a little more excitable since I know what's in store.
I am feeling pretty darn generous too - just so you know!
Let's create some pandemonium here,
especially since the word FREEBIE is involved.
That is, unless you're not at all interested?!
And if that's the case......
that just means there is more for everyone else!!!
(insert evil laugh from The Count here)